Procreate Stamps Back to School: A Practical Asset for Your Digital Toolkit
Understanding the Procreate Stamps Back to School Bundle
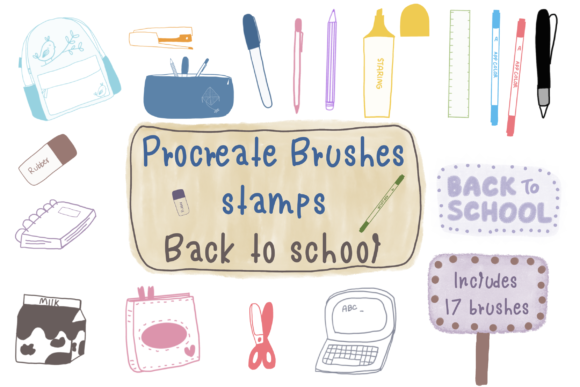
The Procreate Stamps Back to School collection is a specialized set of 17 brush files delivered in a single ZIP archive. Each brush is designed as a stamp that places a complete image—typically a wreath, school-themed icon, or decorative element—directly onto your canvas with a single tap. Unlike standard drawing brushes that rely on continuous stroke, these stamps function as instant placeable assets, making them ideal for projects that require repeated motifs, consistent styling, or rapid composition.
This bundle fits naturally into the broader ecosystem of digital creation tools. It is not a standalone solution but rather a component within a workflow that includes the Procreate app, a stylus (such as an Apple Pencil), and your own design decisions. Whether you are a freelance illustrator, a marketing professional producing social media content, a teacher creating classroom materials, or a hobbyist maintaining a bullet journal, these stamps reduce repetitive manual work and help maintain visual coherence across your output.
Where These Stamps Fit in a Creative Process
In a typical workflow, a creative project passes through several phases: ideation, layout, execution, refinement, and delivery. Stamps like those in the Back to School set are most useful during the execution and refinement stages. During ideation, you might sketch rough concepts; but once you decide on a theme, the stamps allow you to quickly populate areas with polished elements without redrawing the same icon repeatedly.
For example, if you are designing a back-to-school Instagram post series, you can use the wreath stamp as a frame, then layer a text box or photo inside. The stamps also serve as ready-made motifs for bullet journal weekly spreads, where you need a consistent header image across multiple pages. In a business context, a small business owner creating branded flyers for a seasonal promotion can use the stamps to add a uniform decorative element while saving time that would otherwise be spent manually drawing each component.
Before You Start: Setting Up Your Workspace
Preparation is straightforward. Download the ZIP file, unzip it on your device, then import the 17 brush files into Procreate. Procreate’s brush import function supports these files directly, so you can drag and drop into the Brushes panel. Before beginning a project, organize the imported stamps into a dedicated brush set. Label it clearly (e.g., “Back to School Stamps”) so you can access it without searching through your entire brush library. This upfront organization ensures that when you are in the middle of a design sprint, you can switch tools without friction.
It is also wise to review the stamps before starting. Open each one on a test canvas to see the size, opacity, and scale behavior. Some stamps may render larger than expected; knowing this ahead of time lets you adjust brush size settings or plan your canvas resolution accordingly. If you intend to use the stamps across multiple projects, this preview step also helps you mentally map which stamp works best for which context.
During the Project: Streamlining Execution
Once you are actively designing, the stamps accelerate the process of adding decorative elements. Suppose you are creating a digital planner page for a teacher. You can place a “school bus” stamp in the corner, a “pencil” stamp near a to-do list, and a “book” stamp beside a reading log. Because each stamp is a separate brush, you can adjust its color by changing the brush color in the tool bar—or you can leave it as is if the stamp includes multiple tones. This flexibility means you are not locked into a single palette; you can adapt the stamps to your existing color scheme.
Another advantage during execution is the ability to combine stamps with other Procreate features. For instance, you can apply layer masks to a stamp to blend it into a background, use transform tools to rotate or skew the image for a dynamic layout, or duplicate the stamp layer to create a repeating pattern. These stamps also interact well with Procreate’s clipping masks and alpha lock, allowing you to add shadows or highlights to the stamp after placement. This integration turns a simple stamp into a foundational element that can be customized far beyond its original form.
After the Project: Quality Control and Consistency
After completing a design, review how the stamps appear at different output sizes. If you are exporting for print, check that the stamp resolution matches your file’s DPI. Procreate’s stamps are typically vector-like in behavior but are raster-based; they will scale but may lose crispness if enlarged too much. For digital use, such as Instagram posts or planner pages viewed on screen, this is rarely an issue. For print, test a small sample before committing to a full run.
Consistency is another post-project consideration. When you reuse the same stamp across multiple assets—like a weekly planner series—the visual harmony is maintained. This is especially valuable for professionals who manage brand guidelines. If your brand’s aesthetic includes a certain wreath motif, the stamp ensures that every instance matches perfectly, eliminating the slight variations that occur when drawing freehand. Over a quarter’s worth of content, this consistency builds recognisability and saves hours of manual correction.
Combining with Other Digital Assets
The stamps are most powerful when used alongside other resources. For example, you can layer them over pre-made Procreate color palettes or custom gradients. If you also own Procreate brushes for lettering or texture, you can pair a calligraphy brush with a wreath stamp to create a complete composition in minutes. In a business workflow, you might export the stamp placement as a separate PNG, then import it into Canva or Adobe Spark for final assembly. The stamp itself remains a reusable asset that retains its quality across platforms as long as you retain the Procreate file.
If you work with a team, consider sharing the brush set via cloud storage so that everyone uses the same stamps. This standardisation helps when multiple people contribute to the same project or when you hand off a file to a colleague. Because the stamps are brush files, they embed into the Procreate document’s brush library, so even if the recipient does not have the original set, the stamps will still appear correctly when the file is opened—as long as the brushes were not flattened into a single layer.
Organizing for Long-Term Use
Efficient long-term use depends on how you manage your brush library. After importing the 17 stamp brushes, group them by subtheme if the set includes variations (e.g., wreaths, school supplies, letters). You can create sub-folders within Procreate’s brush tab. Label each folder with a clear name that reflects the project type, such as “Back to School – Wreaths” or “Back to School – Icons.” This granular organization prevents you from scrolling through dozens of similar stamps when you need a specific element.
Also, consider saving a master version of each stamp with default settings you prefer. For instance, if you always use a certain opacity or size limit, adjust the brush properties and then duplicate the brush to keep the original untouched. This gives you a “clean” version and a “modified” version for recurring workflows. Over months of use, this small habit reduces the time spent reconfiguring tool settings.
Practical Tips for Efficiency and Quality Control
When using the stamps for high-volume output, such as 50 planner pages or a series of marketing assets, batch processing becomes important. Create a template file with a consistent canvas size and resolution. Place the stamp elements in the same relative positions across all pages. Procreate’s copy-paste layer functionality can help, but a more efficient method is to export the stamp as a PNG and then import it as an image layer. However, using the brush stamp directly gives you faster adjustments on the fly.
Another quality control measure: after placing a stamp, zoom in to check for pixel edges. If you see roughness, you can use Procreate’s add noise or Gaussian blur effects at a low strength to soften the border. This is especially useful if the stamp was designed at a lower resolution than your canvas. Alternatively, you can place the stamp on a separate layer and scale it down rather than up, preserving sharpness.
For color consistency across multiple stamps, set your global color palette before stamping. Since many stamps include their own colors (they are not grayscale brushes), changing the brush color may not affect them. Instead, use Procreate’s “recolor” feature with a clipping mask to impose your palette onto the stamp. This allows you to unify a design that uses several different stamps from the same set without clashing hues.
Observations on Usability and Adaptability
The Procreate Stamps Back to School bundle is designed with a specific theme, but its usability extends beyond academic contexts. Wreath stamps can frame photos for wedding announcements, holiday cards, or blog headers. School-themed icons like pencils, apples, or books can also represent education in a broader sense—think tutorial thumbnails, online course graphics, or library marketing. The 17-file count is intentional: enough variety to cover multiple applications without overwhelming the library.
One notable aspect is the brush responsive pressure and tilt. Some stamps may react to pressure, altering size or opacity depending on how hard you press. If you prefer a consistent stamp regardless of input, you can adjust the brush’s “apple pencil sensitivity” setting to zero in the brush properties. This turns the stamp into a pure tap-to-place tool, which is often more predictable for repeating patterns.
In a team or client setting, these stamps improve turnaround time. A graphic designer can quickly propose a layout using the stamps, then refine later. A teacher can build a month of classroom posters in an afternoon. The key is not the stamps themselves but how they slot into your existing process: they remove the need to source or draw the same element repeatedly. For someone who values efficiency and consistency, this small addition to the digital toolbox can have a noticeable impact on daily output.