Back to School Monitor Outline: A Guide to Getting It Right
If you have ever searched for back-to-school design resources, you have likely come across a “Back to School Monitor Outline.” At first glance, it might seem like just another digital file among hundreds. But this particular outline—offered in AI, EPS, SVG, DXF, JPG, and PNG formats—can be a versatile asset for anyone creating classroom decor, social media graphics, stickers, or even physical products. The catch is that many people misunderstand how to choose, use, or apply such a template, which leads to wasted time, poor results, or unnecessary frustration. This article walks through the most common mistakes and shows how to get the most out of your outline, whether you are a beginner or a seasoned creator.
What Exactly Is the Back to School Monitor Outline?
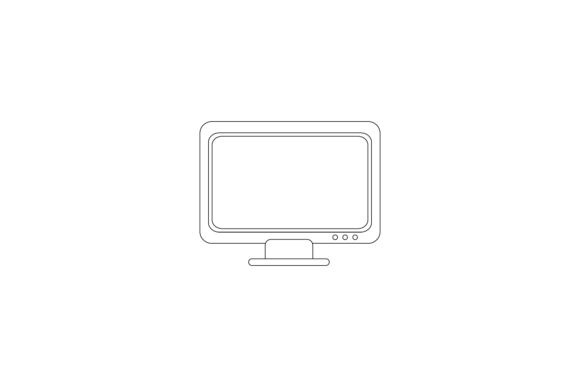
Simply put, the Back to School Monitor Outline is a digital design template featuring a monitor-themed graphic (often a computer monitor with school-related elements or text). It comes in six file formats so that you can edit, cut, print, or scale it across different tools and machines. The 1920 × 1280 px canvas size gives you a high-resolution starting point, and the included vector files (AI, EPS, SVG) allow clean scaling without pixelation. Raster options like JPG and PNG are ready for immediate use in presentations or social media. People are drawn to this template because it combines a modern, tech-forward look with back-to-school vibes—perfect for posters, banners, planners, or even T‑shirt designs.
Common Mistake: Choosing the Wrong File Format for Your Machine
It happens more often than it should: someone downloads the entire set, opens the AI file on a free online viewer, and wonders why the layers are locked. Or they try to upload a PNG to a cutting machine that requires SVG, only to get an error. Each format in the Back to School Monitor Outline serves a specific purpose.
- SVG and DXF are best for cutting machines (like Cricut or Silhouette) because they store shapes as paths.
- AI and EPS are ideal for professional vector editing in Adobe Illustrator or similar programs—layers, gradients, and text remain fully editable.
- PNG with a transparent background works for digital use, web graphics, or mockups.
- JPG is suitable for quick prints but lacks transparency and scalability.
The fix is simple: before you download, think about where and how you will use the outline. If you plan to cut stickers, pick SVG. If you want to tweak the colors and add your own text, then AI or EPS is your best bet. Using the right format from the start saves you from reimporting or recreating your work.
Overlooking Scalability and Resolution
Because the Back to School Monitor Outline includes vector files, you can scale it up to billboard size without losing quality. Yet many people rely solely on the JPG or PNG preview, assuming that is all they get. The real mistake is ignoring how resolution affects your final output. A PNG at 1920 × 1280 px looks crisp on screen, but if you stretch it to 24 inches wide for a poster, it will appear pixelated.
Here is the practical advice: whenever you need large prints or professional-quality products, open the SVG, AI, or EPS file and export at your desired size. If you are unsure how to use vector files, start with a simple tutorial on opening SVG in free software like Inkscape or Canva (Pro). Learning just this one skill can transform your results overnight. The outline is designed to be scalable—you just need to take advantage of that capability.
The Hidden Trap: Ignoring Layers and Editability
A lot of people treat a digital outline like a stamp. They import the JPG, place it, and accept whatever colors or layout it came with. That approach works for basic use, but you are missing the biggest benefit of the Back to School Monitor Outline: the layered vector files. With AI or EPS, you can:
- Change the color of the monitor frame, screen, or background elements individually.
- Remove parts you do not need or combine elements with other designs.
- Add your own school name, dates, or custom text without clashing with the original style.
When you treat the outline as a fixed image, you sacrifice flexibility. Educators and small business owners often need custom variations for different classes or promotions. A layered vector file can be adapted in minutes. If editing vectors feels intimidating, try starting with the PNG on a transparent background and layering it over your own backgrounds in Canva or Photoshop—but know that true editability lives in the SVG, AI, and EPS files.
Assuming All Monitor Outlines Are the Same
Search for “monitor outline” and you will see dozens of options. Some are hand-drawn, some are overly complex, and others are so generic they look like clip art from the early 2000s. The Back to School Monitor Outline stands out because of its clean, modern style and the thoughtful canvas size. Still, people rush to download the cheapest or first result without inspecting the details.
What to check before buying or downloading:
- Look at the preview carefully. Are the lines smooth? Do the proportions look natural? A good outline should be balanced and not overly busy.
- Verify the file formats. The listing explicitly mentions six formats—if you only need one or two, make sure those are included.
- Read the license. If you plan to sell products (stickers, shirts, digital art) using the outline, confirm whether commercial use is allowed. Many outlines come with restrictions, and violating them can get your shop flagged.
- Check the canvas size. 1920 × 1280 px is a widescreen aspect ratio, great for desktop backgrounds or horizontal posters. If your project requires a square or portrait orientation, you may need to crop or adapt it.
Taking five minutes to evaluate the outline beforehand prevents disappointment and rework later.
Skipping a Test Run Before Full Production
One mistake that costs both time and materials is jumping straight into a large batch of products or a major print run without testing. The Back to School Monitor Outline may look perfect in the preview, but every machine, software version, and material behaves differently. A sticker cut from an SVG file might come out slightly misaligned if the outline’s stroke settings are not merged into paths. A print from a PNG might shift color when your home printer uses different ICC profiles.
The better approach: run a small test. Cut one sticker, print one poster on plain paper, or place the outline into one social media mockup. Check alignment, color, scale, and clarity. If something is off, you can adjust the stroke thickness, convert text to outlines, or change the export settings. A single test saves you from wasting an entire roll of vinyl or a stack of cardstock.
Practical Advice for Smooth Workflows
Here is a quick checklist to keep your experience with the Back to School Monitor Outline productive and frustration-free:
- Organize your files. Keep the AI, EPS, SVG, DXF, JPG, and PNG in a clearly named folder. You will thank yourself later when you need to find the cutting file in a hurry.
- Use the right software. For full editing, use Adobe Illustrator (AI, EPS), Inkscape (free, works well with SVG), or CorelDRAW. For quick resizing or color changes in SVG, try Canva Pro or a browser-based SVG editor.
- Back up the original. Always keep a copy of the original files untouched. That way, if you mess up while experimenting, you can start fresh.
- Read the product notes. The description you saw when downloading may contain font names, color codes, or layering hints. Do not ignore those details.
How to Choose the Right Outline for Your Project
If you are deciding whether this outline fits your needs, ask yourself three questions. First, what is the final medium? A sticker or die-cut product works best with SVG or DXF. A digital banner or slide can use PNG or JPG. Second, do you need custom edits, like changing the text or swapping colors? If yes, go for the AI or EPS file. Third, what is your skill level? Beginners often find PNG and SVG the easiest to start with, while professionals appreciate the full editing freedom of AI.
The Back to School Monitor Outline is designed to give you choices. The mistake is trying to use one format for everything. Match the file to the job, and you will get professional results almost effortlessly.
Ultimately, this outline is a tool—and like any tool, it performs best when used correctly. Spend a little time understanding its strengths, test your setup, and make edits that suit your unique project. Whether you are a teacher creating classroom materials, a small business owner launching a back-to-school collection, or a hobbyist making custom gifts, the outline can save you hours of drawing from scratch. Just avoid the common shortcuts and assumptions that trip up so many users. With the right format, a quick test, and a willingness to explore the vector layers, you will have a final product that looks clean, professional, and exactly how you imagined.