Understanding Back to School Cutter Backgrounds: A Complete Guide for Designers and Educators
As the summer winds down and the familiar scent of fresh notebooks fills the air, educators, school administrators, and creative professionals begin their annual ritual of preparing for the new academic year. Among the most versatile tools in their design arsenal is the Back to School Cutter Background. Whether you are a seasoned graphic designer, a DIY classroom decorator, or a parent looking to create custom supplies, understanding what a cutter background is and how to use it can transform your projects. This article explores everything you need to know about these digital assets, from their core purpose to practical applications, file formats, and tips for getting the most out of them.
What Is a Back to School Cutter Background?
At its simplest, a Back to School Cutter Background is a digital design template specifically created for cutting machines — such as Cricut, Silhouette, or Brother ScanNCut — and for general graphic design projects. The term "cutter background" refers to a pre-sized canvas that serves as the foundation for your creative work. These backgrounds typically come with a fixed canvas dimension — in this case, 1920 pixels by 1280 pixels — and are delivered in multiple file formats to ensure compatibility across different software and hardware.
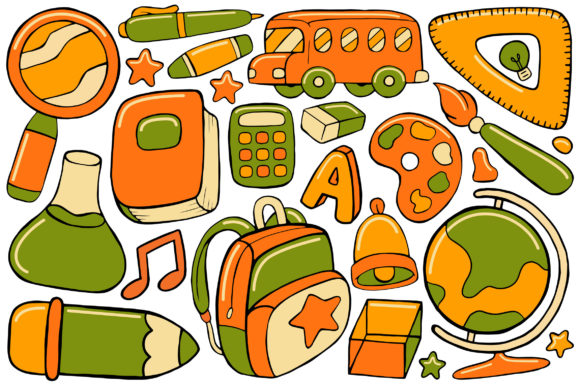
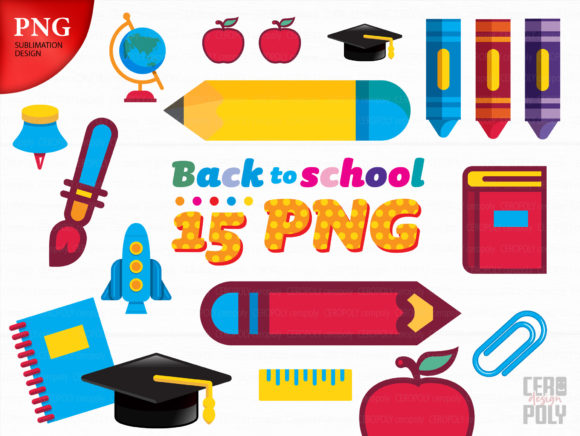
Unlike a simple image, a cutter background is designed with precision cutting in mind. It often includes clear boundaries, transparent areas, and layered elements that allow a cutting machine to follow exact paths. When the theme is "Back to School," the design incorporates classic educational motifs: pencils, apples, books, chalkboards, rulers, globes, backpacks, and cheerful typography. The result is a ready-to-use template that saves hours of design work while ensuring professional-quality output.
Think of a cutter background as a digital canvas that already has the "scene" set. You don't need to start from scratch. Instead, you can drop in your own text, photos, or additional graphics, and then send the file to your cutting machine or printer. This makes it an invaluable resource for anyone who needs to produce consistent, themed materials quickly.
Why "Cutter" Matters
The term "cutter" is key. Standard images are static — they look good on a screen or paper but don't tell a cutting machine where to cut. A cutter background, on the other hand, is engineered for physical creation. The paths, layers, and color separations are optimized so that when you load the file into software like Cricut Design Space or Silhouette Studio, the machine knows exactly which lines to cut, which areas to score, and which parts to leave intact. This distinction is what makes these files so powerful for hands-on projects.
The Purpose and Significance of Back to School Cutter Backgrounds
Why do these backgrounds matter so much, especially during the back-to-school season? Their significance spans several domains: education, creativity, business, and daily life.
Empowering Educators and Classroom Creativity
Teachers are among the biggest beneficiaries of cutter backgrounds. A welcoming classroom environment can significantly impact student engagement and comfort. With a Back to School Cutter Background, a teacher can create custom bulletin board decorations, name tags, door signs, binder covers, and wall art — all unified by a cohesive theme. Instead of spending hours cutting letters by hand or searching for matching clip art, a teacher can download a template, personalize it with student names or class details, and have a cutting machine produce precise, beautiful results in minutes.
For example, a kindergarten teacher might use a cutter background featuring a giant pencil and apple motif to create a "Welcome to Kindergarten" sign. By adding each child's name to individual apple cutouts, the teacher creates a personalized classroom display that makes students feel seen on the very first day.
Streamlining Business for Small Shops and Creators
Small business owners on platforms like Etsy, Teachers Pay Teachers, or creative marketplaces rely on cutter backgrounds to produce inventory efficiently. A single digital file can be used to create hundreds of physical products: stickers, iron-on transfers, cardstock decorations, party favors, and more. The 1920x1280 canvas size is large enough for high-resolution printing while remaining manageable for digital storage and file transfer. For a seller, offering a pack of cutter backgrounds in multiple formats (AI, EPS, SVG, DXF, JPG, PNG) means reaching a wider audience — from professional designers using Adobe Illustrator to hobbyists working with free software.
Enhancing Family and Community Activities
Back-to-school season isn't just for teachers and business owners. Parents and community organizers also find immense value in these templates. Think about creating custom homework folders, lunchbox notes, classroom volunteer badges, or even party decorations for a back-to-school celebration. A cutter background makes these projects accessible to anyone with a basic cutting machine, regardless of their design skills.
Understanding the File Formats: AI, EPS, SVG, DXF, JPG, PNG
One of the most common sources of confusion for beginners is the variety of file formats included in a cutter background pack. Let's break down each format and its specific use case, so you can confidently choose the right one for your project.
AI (Adobe Illustrator)
The AI file is the native format for Adobe Illustrator. It preserves all layers, vectors, and editable elements. If you are a professional graphic designer or someone who needs to make detailed modifications — changing colors, adjusting shapes, or adding complex typography — the AI file gives you full control. It's the master file from which all other formats are derived.
EPS (Encapsulated PostScript)
EPS is a versatile vector format that can be opened by many design programs, including older versions of Illustrator, CorelDRAW, and even some free tools like Inkscape. It retains vector quality, meaning you can scale it to any size without losing sharpness. EPS is a good middle-ground option if you need compatibility across different software ecosystems.
SVG (Scalable Vector Graphics)
SVG has become the gold standard for cutting machines, especially Cricut and Silhouette users. It is an XML-based vector format that is widely supported by design software and web browsers. SVG files are lightweight, scalable, and maintain crisp lines at any size. Most cutting machine software imports SVG files seamlessly, preserving layers and cut paths. If you are using a Cricut, the SVG format is likely your best friend.
DXF (Drawing Exchange Format)
DXF is another vector format, originally developed by Autodesk for AutoCAD. It is commonly used in the CNC and laser cutting world, but many paper cutting machines also support it. DXF files are excellent for projects that require precise technical lines, such as intricate papercuts or layered cardstock designs. If your software struggles with SVG, DXF often works as a reliable alternative.
JPG (Joint Photographic Experts Group)
JPG is a raster (pixel-based) image format. It is best for previewing the design, sharing on social media, or using in projects that don't require cutting — such as digital presentations, flyers, or web graphics. Because JPG compresses the image, it may lose some detail, but for general viewing, it is perfectly adequate.
PNG (Portable Network Graphics)
PNG is also a raster format, but with one critical advantage: it supports transparency. This means you can place the design on any colored background without a white box around it. PNG files are ideal for use in word processing software (like Microsoft Word or Google Docs), presentation tools, and simple photo editing apps. They also work well for print-on-demand products where a transparent background is needed.
Having all six formats in one pack ensures that no matter what software or machine you own, you can use the file immediately. This is a hallmark of a well-prepared digital product.
How to Use a Back to School Cutter Background Effectively
Now that you understand what these files are and why they exist, let's walk through a practical workflow. Whether you are a beginner or an experienced user, these steps will help you get the most out of your template.
Step 1: Choose the Right Format for Your Tool
Start by identifying your end goal. If you are cutting physical material with a Cricut, open the SVG file. If you are editing in Adobe Illustrator, use the AI file. If you need a quick visual preview, open the JPG or PNG. This simple decision saves time and frustration.
Step 2: Personalize and Customize
Open the file in your chosen software. Most cutter backgrounds are designed with editable text fields or empty spaces where you can add names, dates, or messages. For example, a chalkboard-style background might have a blank center where you can type "Welcome Back, Students!" Use a font that is both readable and fun — script fonts work well for names, while bold sans-serif fonts are great for headlines.
Step 3: Prepare Your Cutting Mat
Load your cutting machine with the appropriate material — cardstock, vinyl, iron-on, or even fabric. Ensure the material is properly aligned on the mat. In your software, select the "Cut" or "Make It" option, and the machine will read the vector paths from your file.
Step 4: Assemble Your Project
After cutting, weed away the excess material (remove the parts you don't need). Use transfer tape for vinyl projects, or simply peel and stick for paper. Assemble layered pieces in the correct order — for instance, the apple cutout goes on top of the pencil background.
Step 5: Display or Gift
Your finished project is now ready. Whether it's a classroom door decoration, a custom tote bag, or a set of pencil-shaped bookmarks, the result will look polished and intentional.
Common Misunderstandings About Cutter Backgrounds
Despite their popularity, there are a few misconceptions that can trip up new users. Let's clear them up.
- "All cutter backgrounds are the same." Not true. Quality varies greatly. A well-designed cutter background has clean vector paths, appropriate layering, and a thoughtful composition. The 1920x1280 canvas size in this product is specifically chosen to provide a wide, landscape orientation that works well for banners, signs, and wide-format projects.
- "I need expensive software to use these files." While AI and EPS files may require paid software like Adobe Illustrator, SVG and DXF files can be opened in free tools like Inkscape, or directly in Cricut Design Space and Silhouette Studio. You do not need a huge budget to benefit from these templates.
- "JPG and PNG are useless for cutting." Actually, they are valuable for non-cutting purposes — previews, digital use, and print-only projects. They complete the pack so you have everything in one place.
- "Cutter backgrounds are only for experienced designers." On the contrary, these templates are designed to be beginner-friendly. The hard work — composition, color harmony, and path creation — is already done. Beginners simply need to add their personal touch.
Practical Applications Across Different Scenarios
To truly appreciate the versatility of a Back to School Cutter Background, consider these real-world examples:
Classroom Organization
Create a set of subject labels (Math, Reading, Science) using a consistent cutter background theme. Laminate them for durability, and use them to organize bins, shelves, or bulletin boards. The visual consistency helps students navigate the classroom independently.
Student Gifts and Rewards
Cut out small bookmark shapes or pencil toppers from the background design. Add each student's name and a motivational phrase. These inexpensive yet personal gifts build classroom community and excitement for learning.
School Events
For a back-to-school night or open house, use the cutter background to create directional signs, welcome banners, and treat bag toppers. The cohesive theme makes the event feel professionally organized.
Digital Content Creation
Use the JPG or PNG version as a background for social media posts, classroom newsletters, or educational videos. The 1920x1280 resolution fits perfectly into YouTube thumbnails, Instagram posts, or slideshow presentations.
Why This Specific Canvas Size Matters
The 1920x1280 pixel canvas size is not arbitrary. This aspect ratio (3:2) is a common standard for banner printing, wide-format documents, and digital displays. It provides enough horizontal space for typography and imagery without feeling cramped. When printed at 300 DPI, this resolution yields a physical size of approximately 6.4 inches by 4.27 inches, which is ideal for medium-sized cutouts or as a base layer for larger compositions. For digital use, 1920 pixels wide matches the standard width of many monitors and screens, ensuring the design looks great on a laptop or tablet.
Conclusion: Unlocking Creative Potential with the Right Tools
The Back to School Cutter Background is far more than a simple digital file — it is a gateway to efficient, beautiful, and personalized creation. By understanding what these backgrounds are, how they work across different file formats, and how to apply them in real-world scenarios, you can save time, reduce stress, and produce results that delight students, customers, and family members alike. Whether you are a teacher preparing a warm classroom environment, a small business owner stocking your shop, or a parent creating something special for your child, these templates put professional design power in your hands.
As you explore your next project, remember that the best designs start with a solid foundation. A well-crafted cutter background provides exactly that — a foundation that is flexible, forgiving, and full of possibility. So go ahead, download your files, fire up your cutting machine, and make this back-to-school season the most creative one yet.