Back to School Gnomes Sticker: Practical Tips to Avoid Common Mistakes
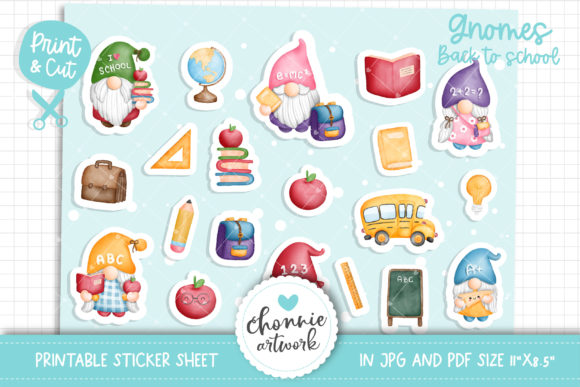
If you have stumbled across the Back to School Gnomes Sticker from Chonnieartwork, you are looking at a cheerful, whimsical way to bring some personality into your planning, scrapbooking, or small business projects. These cute printable sticker sheets feature adorable gnome designs with a back-to-school theme, and they come as a single JPG and PDF file, ready to print at home. But as simple as printable stickers seem, there are a handful of common mistakes people make that can affect how your stickers turn out, how long they last, and whether they truly serve your project. Let me walk you through what to watch for so you get the most out of your gnome stickers every time.
What Are These Gnome Stickers and Why Do People Love Them?
The Back to School Gnomes Sticker set is a digital download that includes one 11 x 8.5 inch JPG at 300 dpi and one PDF file. You print the sheet yourself, then cut out each sticker using scissors or a craft cutter. The gnome illustrations are playful and colorful, making them perfect for decorating planners, creating handmade stationery, sprucing up greeting cards, or adding charm to scrapbook pages. Small business owners and freelancers also use these stickers to add a personal touch to client orders, product packaging, or branded materials.
Because these are digital files, you control the quality, the paper, and the timing. That flexibility is wonderful, but it also means the final result depends heavily on the choices you make before and during printing. Many people assume printable stickers are foolproof, but a few overlooked details can turn a delightful sheet into a frustrating experience.
Mistake 1: Ignoring Monitor and Printer Variations
One of the most common frustrations people voice is that the printed colors do not match what they saw on screen. Chonnieartwork clearly states that colors may vary from monitor to monitor, from paper quality, and from printer to printer. Yet many users skip this note and then feel disappointed when the gnomes' hats come out slightly darker or the background looks a bit washed out.
How this affects your project: If you are using the stickers for a planner or a product you intend to sell, color mismatch can make your work look less polished. A greeting card with muddy or overly bright gnomes may not have the same charm as you imagined.
What to do instead: Before printing the full sheet, print a small test section on plain paper. Compare it to your screen under natural light. Adjust your printer settings if needed. Many printers have a "photo" or "high quality" mode that improves color accuracy. Also, calibrate your monitor if possible. Small adjustments before the final print save paper, ink, and disappointment.
Mistake 2: Using the Wrong Paper
Printable stickers are only as good as the paper you use. Standard copy paper will soak up ink, causing colors to bleed and edges to look fuzzy. The gnome designs have fine details and bright colors that need a smooth, coated surface to look crisp. Some people use regular paper and then apply adhesive, but that often leads to curling, wrinkling, or stickers that peel off after a few days.
How this affects your results: If you are a small business owner or a hobbyist who wants stickers that last on a planner or a gift tag, cheap paper will make your work look amateur. The stickers may smear if they get even slightly damp, and the colors will lack that vibrant pop gnome illustrations deserve.
Better approach: Invest in matte or glossy sticker paper designed for inkjet or laser printers (check which type you have). These papers have a coating that holds the ink on the surface, giving you sharp lines and vivid colors. For planners, matte sticker paper is often preferred because it resists fingerprints and works well with pens. If you want a shiny, glossy finish, choose glossy sticker paper, but be aware that some markers may smudge on it.
Mistake 3: Rushing the Cutting Process
Cutting out stickers by hand can be meditative and rewarding, but it can also be a source of frustration if you rush. The gnome designs have small details, like tiny books, apples, and hats, that require patience. Many people grab scissors and try to cut quickly, resulting in jagged edges or accidentally snipping off a gnome's hat or foot.
How this affects usability: Unevenly cut stickers look messy on a planner page or a card. They may also peel more easily because the edges are not clean. If you sell or give away items decorated with these stickers, sloppy cutting reflects poorly on your brand.
Practical advice: Use a sharp pair of detail scissors or a craft knife with a cutting mat. Take your time and cut slowly around each gnome. If you have many sheets to cut, consider using a cutting machine like a Cricut or Silhouette, especially if you are a small business owner. Chonnieartwork's PDF file can be uploaded into cutting machine software, making the process much faster and more precise.
Mistake 4: Overlooking the File Type and Resolution
The download includes one JPG and one PDF, both at 300 dpi and sized 11 x 8.5 inches. Some people try to resize the image in a word processor or a basic photo editor without maintaining the aspect ratio, which can distort the gnomes or lower the resolution. Others accidentally print from the JPG at a lower resolution, resulting in pixelated or blurry stickers.
How this affects quality: A stretched or pixelated gnome loses its charm. The cute details become fuzzy, and the sticker looks unprofessional. If you are using these stickers for a blog post, a product photo, or a printable you sell, poor resolution undermines your credibility.
What to check: Always print at 100% scale, not "fit to page" unless you are sure your printer margins match the 11 x 8.5 inch sheet size. Use the PDF file for printing if possible, as it preserves the layout and resolution better than JPG in many cases. If you need to resize, use a dedicated image editor and keep the aspect ratio locked. Do not enlarge the image beyond its original dimensions, as you will lose sharpness.
Mistake 5: Not Testing Adhesion and Compatibility
Printable sticker paper comes with different adhesive strengths. Some are removable, some are permanent. If you plan to use your gnome stickers in a planner that you revisit daily, a permanent adhesive may leave residue when you remove a sticker, while a removable adhesive may peel off too easily. Many people do not think about this until after they have stuck a gnome on a page and then want to move it.
How this affects satisfaction: If you use permanent adhesive on a planner you want to keep clean, you may end up regretting it. Conversely, if you use removable adhesive on packaging that will be handled often, your sticker might fall off before reaching the customer.
Better strategy: Read the product description of your sticker paper carefully. Some papers offer repositionable adhesive, which is ideal for planners. For permanent applications like gift tags or product labels, choose a paper labeled "permanent adhesive." Test a single sticker on the surface you intend to use before committing to a whole project.
Mistake 6: Ignoring the Digital Nature of the Product
Because this is a digital download, you receive no physical item in the mail. A few people overlook this and expect a printed sheet to arrive. Others do not save the files properly and lose access after downloading. Some try to use the JPG on a phone or tablet without transferring it to a computer, which can lead to printing issues.
How this affects your experience: Losing the file means you need to contact the seller for a re-download, which takes extra time. Printing from a mobile device often strips out the correct resolution or color profile, leading to disappointing results.
Simple steps to avoid this: As soon as you purchase, download the files to your computer and save them in a folder you can find later. Back them up to cloud storage or an external drive. When you are ready to print, open the PDF on a computer and print from there. Keep the JPG as a backup. Treat digital files with the same care you would a physical product.
Mistake 7: Using Stickers Without Considering the Surface
Not all surfaces are sticker-friendly. Glossy planner pages, laminated covers, and some types of paper repel adhesive. People often stick a gnome onto a laminated notebook cover only to watch it peel off within hours. Others place stickers on pages they write on, only to find the pen ink smears across the sticker edge.
How this affects your work: A sticker that falls off or smears defeats its purpose. If you are using the gnomes to decorate products for customers, a failed sticker can leave a bad impression and create extra work.
How to get it right: Before applying, clean the surface with a dry cloth to remove dust or oils. On glossy surfaces, gently roughen the area with a soft eraser or choose a sticker paper with extra strong adhesive. If you plan to write over the sticker with pen, test a small corner first, or use a ballpoint pen instead of a gel pen, which tends to smear more on glossy finishes.
Final Thoughts on Getting the Most from Your Gnome Stickers
The Back to School Gnomes Sticker from Chonnieartwork is a versatile and charming addition to any crafter's toolkit, whether you are an experienced small business owner or a beginner exploring planner decoration. The key to success lies in the details: choose the right paper, test your printer settings, cut carefully, and think about how and where you will use the stickers. These small adjustments transform a simple printable into a polished, durable, and delightful product.
Take a few extra minutes to prepare before you print. That little bit of foresight will save you from wasted sheets, frustration, and subpar results. Your gnomes deserve to look their best, and with the right approach, they will bring a smile to every page, card, or package they adorn.